Friday, September 24, 2010

Pop Art Puppy :)

Sooo this puppy was originally all brown, but during the process of making it into "Pop Art", he turned darker, but still cute :)

Photoshop:)
Tools used were Grayscale Adjustment Layer, Threshold Adjustment Layer, Dodge/Burn Tool, Blending Mode was Multiply, Brush tool, Eraser Tool, Magic Wand and Halftone Pattern. :)

Tuesday, September 21, 2010

Change My Look - Ashley:)

We also had to change the look of someone else, so I did Ashley. Her haircolor was changed to a more brunnette color, and again the eye color wasn't able to change because her eyes were dark. I made her a giant in NYC with her new best friend, King Kong, and people attempting to attack her from the helicopter.

Photoshop:)
*Same tools used as my previous post:)*

Change My Look - Me:)


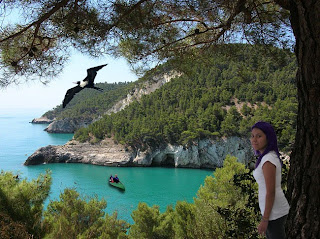
For the Change My Look project we needed to change our hair color, eye color, and add two extra items. Hair color was changed to purple and I couldn't change my eye color because my eyes are too dark.

Photoshop:)

Tools used for the hair were Quick Mask, Brush Tool, blending options, Eliptical Marquee Tool, Polygonal Lasso Tool, Magic Wand Tool, and Copy & Paste.


Tuesday, September 14, 2010

Celebrity Makeover

Zac Efron's original hair is dark with blonde-ish highlights, so I changed it to more red color, as well as his eye color that was originally blue.
Photoshop:)
Tools used were Quick Mask, Brush Tool, Blending mode for hair: Soft Light, Eliptical Marquee Tool, Polygonal Lasso Tool, and the Blending Mode for the eyes were: Overlay.

Monday, September 13, 2010

Change in Appearance

Original hair color of this odd looking person was blonde, but our assignment was to change it, so I changed to purple.
Photoshop:)

Tools used were the Quick Mask, Brush Tool, Blending options was changed to Soft Light, and I used Copy & Paste.
The original eye color was more of green-ish, so we had to change the eye color to whatever we wanted to, so I chosed this blue-ish color.
Photoshop:)
Tools used were the Eliptical Marquee Tool, Polygonal Lasso Tool, changed the Color Balance and set the blending option as Overlay.

Thursday, September 9, 2010

Layer Masks

So, in Photoshop, we learned how to use layers and had to use mainly all layers and masks, so we needed a landscape, a sky, and a tree. We also needed three more images which I decided to put in a tractor and two cows:)
Photoshop:)
Layer masks, obviously.

Montage


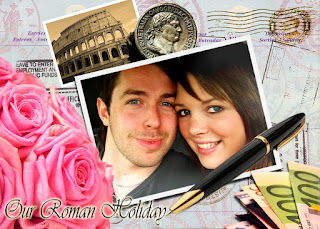
We were given different pictures and put them all together into a montage in Photoshop. Then we had to mess arange them in a reasonable way and add layer styles that included a drop shadow, bevel and emboss.
Photoshop:)
Merging, duplicating, deleting, and pasting of layers; Scale, flip, and rotating; Layer effects; Layer masks

Tuesday, September 7, 2010

The *Magic* Wand


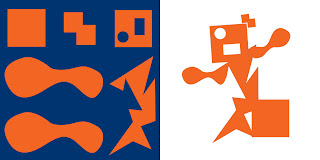
The Magic Wand tool in Photoshop selects by color, so we had to take the orange shapes on the left and place them on the right. Then we had to transform them and put them all together to make some sort of shape.
Photoshop:)
The only tool that I obviously used was the Magic Wand Tool.

Dolphant :)

Had to make an animal, that obviously doesn't exist. Mine was a combination of a chicken, dolphin, duck, elephant, ostrich, and zebra. It was also wearing a top hat to go along with his personality. He's swimming out in the sea :)

Photoshop:)
Tools used were the Quick Selection, Magnetic Lasso, and the Clone Tool.

Friday, September 3, 2010

All About Me

First blogpost from Digital Imaging class :)

It's all about me which includes what matters a lot in my life. This includes playing tennis, music, photography, my education, and technology. I'm proud to say that I am from Mexico and my favorite things include my dog, going to Florida, and Converse shoes. I live my life to the fullest and I do live, laugh, and love.
Photoshop:)
Tools I used include Quick Selection Tool, Magic Wand tool, Clone stamp, and the Stamp Tool.